

Project
Behind the tile: demolition, waterproofing and tile setting
The stages nobody photographs, because they exist for about a week and are then sealed inside the wall permanently. This is the part of a bathroom you are actually paying for.
- Waterproofing
- Rough-in
- Tile setting
Why we photograph this
Ask any contractor for photographs of their finished work and you will get them. Ask for photographs of the waterproofing before the tile went on and the conversation gets shorter.
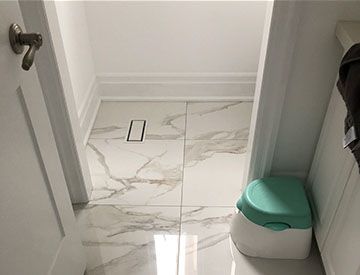
That is the point. A finished bathroom photograph proves nothing, because anyone can license one. A photograph of a shower pan with the membrane down, taken in a room that is now somebody's ensuite, can only come from the person who built it.
It is also the only record you will ever have. Once the tile is on, there is no way to inspect what is underneath without destroying the room. We send these photographs to the homeowner as they happen, and we would suggest asking any contractor you are considering to do the same, including us.
Strip-out
Bathrooms come back to studs and subfloor. Not for drama, but because you cannot inspect what you cannot see, and the two things most likely to be wrong in an older bathroom, a soft subfloor and failed waterproofing, are both invisible until the tile is off.
This is where surprises turn up: rot around the toilet flange, supply lines narrowed with corrosion, a fan ducted into the attic instead of outside, or framing badly notched by whoever ran the plumbing forty years ago. When we find something we photograph it, show you and price the repair before touching it.


Waterproofing
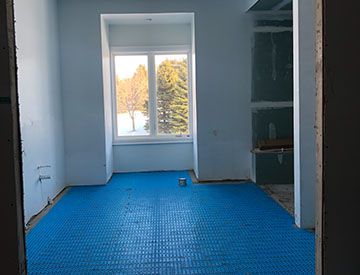
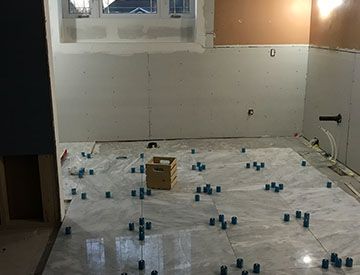
The blue layer across the floor is waterproofing membrane, and it is the single most important thing in a bathroom. It goes over the substrate, before any tile, and it is what actually keeps water inside the room.
People assume tile and grout are waterproof. Neither is. Grout is porous by design and tile joints move. The membrane is the barrier; the tile is the wearing surface on top of it. In a shower it has to be carried up the walls, lapped through every niche, sealed at every internal corner and bonded to the drain assembly. A gap anywhere in that chain is a leak that takes two to four years to show up in the ceiling below.
This is where cheap quotes get cheap. Skipping the membrane and setting tile straight onto cement board saves a day of labour and a few hundred dollars in material. It also passes every inspection a homeowner is able to make, right up until it does not.
Levelling clips and large-format tile
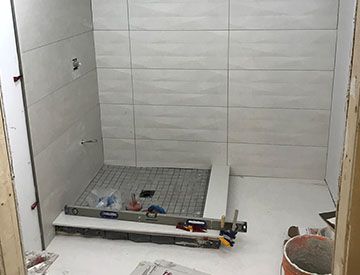
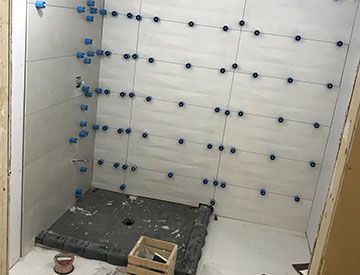
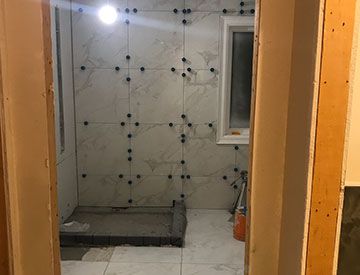
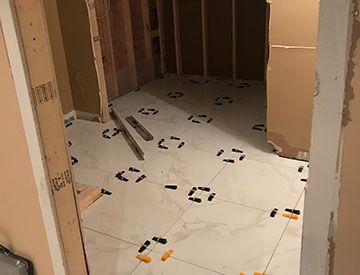
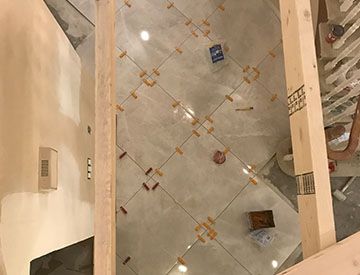
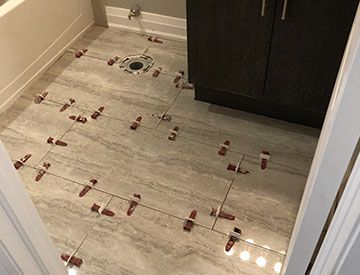
The blue and black clips in these photographs are tile levelling clips. Large-format porcelain has a slight bow, and at 24 inches or more a difference of a millimetre between the edges of two tiles catches light across the surface and is visible from the doorway. That is lippage, and it is the most common visible defect in an otherwise competent tile job.
Clips hold neighbouring tiles in the same plane while the thinset cures, then snap off at the base. They are cheap, they slow the job down, and they are the difference between a wall that looks flat and a wall that looks nearly flat.
Large format also demands a flatter substrate to begin with. The bigger the tile, the less the adhesive bed can absorb, so walls and floors are checked and levelled before anything is set rather than being corrected with extra mortar as the tiler goes.

Floor layout
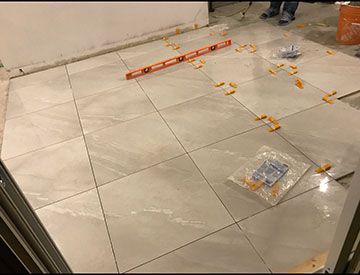
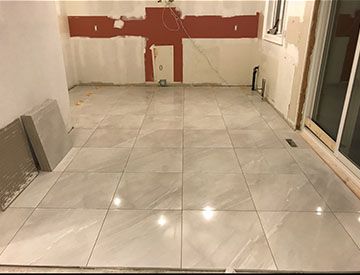
Floor tile is set out from the centre of the room or from the most visible sight line, not from a corner. Starting in a corner is faster and guarantees a thin, awkward sliver of cut tile along the wall you look at most.
Large-format floor tile in a small bathroom is a balancing act: fewer grout lines make the room read larger and are easier to clean, but every cut is more visible and there is less room to absorb a wall that is not square. Old houses very rarely have square rooms.

The sequence
Strip-out to studs and subfloor. Inspect and photograph whatever is found.
Plumbing and electrical rough-in. Blocking set for glass hardware and any future grab bars.
Rough-in inspection passes before anything is closed up.
Board, then the sloped shower substrate formed.
Waterproofing membrane, lapped through niches and bonded at the drain.
Tile, set out from sight lines, levelling clips throughout.
Grout, seal, fixtures. Glass templated off the finished tile.
Questions people ask
Is tile not waterproof on its own?
No. Porcelain itself absorbs very little, but grout is porous and joints move. Water passes through the tiled surface and is stopped by the membrane behind it. That is why the membrane exists.
How do I know my contractor actually waterproofed the shower?
Ask for photographs taken before the tile went on, dated, in your bathroom. If they cannot produce them, the honest interpretation is that nobody took them. Insist on it at the quote stage rather than afterwards.
Why does the rough-in inspection matter?
It is the only independent check anyone will ever make of the work inside your walls. A municipal inspector looks at the plumbing and electrical before it is covered. Once tile is on, that opportunity is gone for the life of the room.
Related
Ask us for the photos
On every job we send the waterproofing and rough-in photographs to the homeowner as they happen. No job is closed up without them.